The light and moist pumpkin cake pairs perfectly with the rich cream cheese frosting swirl! Add some fun fall decoration and you will certainly impress your Thanksgiving guests.
So, full disclosure, I love baking basically everything but for some reason baking and decorating cakes has always fallen to the bottom of my list. I have always felt that I lack the finesse that it takes to perfectly decorate a cake, and have always been super jealous of the bakers that can make baking a beautiful cake look so effortless. But, something that I DO love? Cake rolls! I love the proportion of cake rolls (they really only make 8-12 slices, so you will not be overwhelmed with any leftovers), and I love their appearance! The swirl of the filling is so pretty, and there are SO many flavor combinations that you could try out. They also require no additional decorating – which is a plus for me!

Let me first assure you that cake rolls are easier to make than they look. I will walk you through all of the steps, tips and tricks, so you will come away from this blog totally ready to make the perfect cake roll. For this cake roll, I also added some patterned leaves. While this is not necessary for your cake roll, it does add an extra element that will impress your friends and family!
I got the pumpkin cake recipe and the idea for the leaf pattern from the SugarHero blog, linked here. I have changed the filling and used my favorite cream cheese frosting recipe instead, and have updated the leaf pattern recipe to get the cake consistency that I desired.
So, what exactly is a cake roll? Cake rolls are also referred to as Swiss Rolls, Swiss Cake Rolls, Jelly Rolls or Cream Rolls. Whatever term you use, this dessert is made up of a thin layer of sponge cake filled and with whipped cream, jam or frosting. There are many different flavor combinations, and you could use your own creativity to come up with a new one as well! Now let’s move on to how to bake the perfect cake roll.
Tips to make the best cake roll:
- Always bake on parchment paper. The cake is very thin and delicate, so you will need to be able to remove it from the pan easily.
- Pre-roll the cake immediately upon taking it out of the oven. If the cake is still warm, it will be more flexible and less likely to crack.
- Don’t be shy with the powdered sugar (or cocoa powder) when turning out the cake. One of the steps to making a cake roll will always be turning it out on to a tea towel or parchment paper so that you can roll it. The parchment paper or towel will be coated with powder so that the cake doesn’t stick. Use a lot of it.
- Don’t go too crazy with your fillings. While it’s important to get a good layer of frosting, whipped cream, jam, etc. in the center of your cake roll, if you add too much you won’t be able to properly roll the cake and in turn will not get the signature swirl.
- Don’t panic if your cake does crack! Trust me, I’ve had my fair share of cracks. Just roll with it and keep rolling your cake! Then immediately put the cake in the fridge to set. Once it’s set, you can deal with the crack by covering it with powdered sugar, chocolate, whipped cream, frosting, etc.
- Use a Jelly Roll pan. While a large rimmed baking pan can be used in a pinch, I prefer to use an actual Jelly Roll pan since it is slightly wider and has a deeper rim (which will better support the rise of the cake).
- Make sure to beat the eggs and sugar well. While most recipes with contain baking powder or baking soda to give the cake a little rise, some rise will also come from beating air into the eggs. When the recipe calls for beating the eggs and sugar well, make sure you do so!
Now let’s dive in to the details of this beautiful patterned pumpkin cake roll! The first step will be tracing your leaf pattern on to parchment paper. To find a good pattern, simply Google ‘fall leaves coloring sheet’ and you will find a few options to choose from. Print the photo and trace the leaves on to parchment paper that has been trimmed to fit your Jelly Roll pan. Then turn over the parchment paper so that the writing will not touch the actual cake batter. I also grease the bottom of the pan so that the parchment paper evenly sticks to the pan.
Things you will need for this cake roll:
- Jelly roll pan
- Piping bags
- Food coloring
- A printed page of leaf patterns to trace
- A clean tea towel
- Parchment paper
- Additional ingredients listed below

Next you will be piping your leaf patterns with cake batter. First mix together your pattern batter and separate it into 3-4 different bowls. Then use food coloring to make your desired leaf colors (I usually make one brown, red, orange and sometimes yellow). Then put the batter into piping bags and cut a very small tip for each one. First pipe the outlines of your leaves, then freeze for 20-30 minutes (freezing helps the batter not to run as you add additional colors). Remove the pan from the freezer and fill in the leaves with desired colors (freeze after each color addition). Use your own creativity here! See the photos below for some ideas. Once you are finished piping, place the pan back in the freezer as you make the rest of the pumpkin batter.

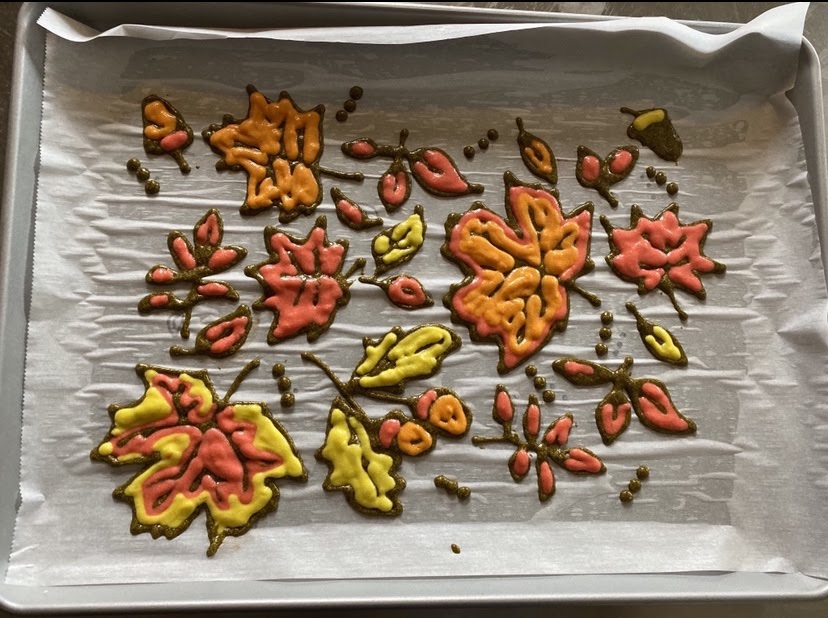
Now that we have one of the harder parts out of the way, it’s time to make the pumpkin cake batter! Make sure that you beat the eggs and sugar well, per the instructions. This will add air to the mixture and give the cake some additional rise. Gently and evenly, spread the batter over the leaf pattern and bake. Be prepared for that timer to go off, because once that cake come out of the oven, some of the most important steps begin!
While your cake is baking, place another piece of parchment paper on top of a large rimmed baking sheet that is turned over. You will be flipping your warm, fresh out-of-the-oven cake roll on to this so that you can expose the leaf pattern. Also make sure that you have a clean tea towel handy, as you will be using this to do the final roll on your cake roll.
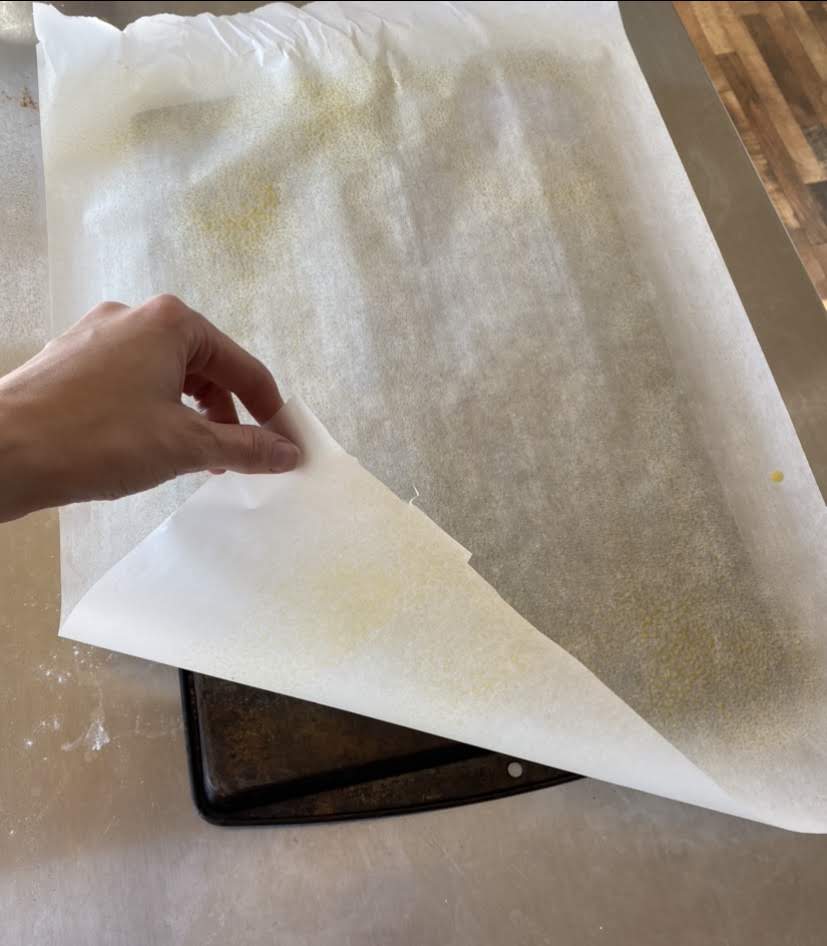
You will know that your pumpkin cake is done once the edges are slightly browned and the sponge springs back to the touch. Once you remove the cake from the oven, you will immediately flip it over on to your prepared cookie sheet. See below.

Now begins the flipping of your cake roll. These steps are a little more detailed because you will need the leaf pattern to show on the outside of your cake roll. Follow along closely with the photos below.

Step 1: Flip your cake roll on to your prepared parchment paper & upside down cookie sheet.
Step 2: Remove the parchment paper to expose your leaf design.
Step 3: Generously cover the leaf pattern with powdered sugar.
Step 4: Place a tea towel and your jelly roll pan on top of the sugared cake.
Step 5: Flip the cake again and peel away the parchment paper.
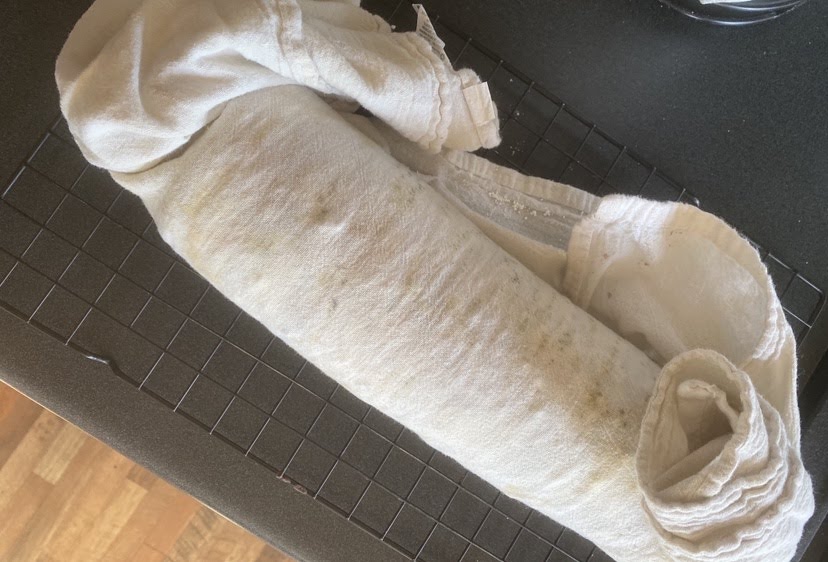
Step 6: Generously sugar this side of the cake as well, then roll your cake with the tea towel (the tea towel will be rolled into your cake).
Step 7 (below): place the rolled cake on to a cooling rack and let it sit until it cools to room temperature. Prepare your cream cheese frosting as you are waiting for the cake to cool.
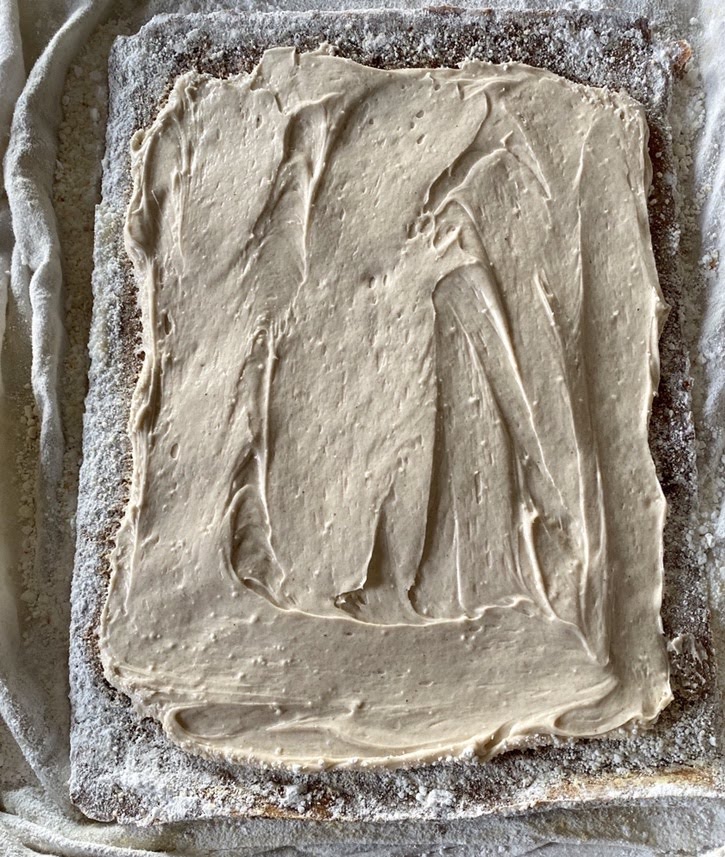
Step 8: Once the cake has cooled to room temperature, unroll it and spread your cream cheese filling over the top of the cake, leaving 1 inch bare on each side. See below.
Step 9: Carefully roll the cake back up and you have your cake roll! Be sure to note that your pattern will be covered in powdered sugar. Carefully brush off what you can, then let the cake set in the fridge overnight. Most of the powdered sugar will soak in to the cake overnight. Any remaining sugar can be wiped away with a little water. Anddddd, it’s official! You have finished your patterned pumpkin cake roll. I hope you enjoy it as much as I did!

Patterned Pumpkin Roll
Ingredients
For the pattern batter
- ¾ cup all-purpose flour
- ¾ teaspoon baking powder
- ¼ teaspoon salt
- ¼ cup unsalted butter softened
- ½ cup granulated sugar
- 1 egg
- ½ teaspoon vanilla extract
- ⅓ cup milk
For the pumpkin cake
- ¾ cup all-purpose flour sifted
- ½ teaspoon baking powder
- ½ teaspoon baking soda
- 2 teaspoons pumpkin pie spice
- ½ teaspoon salt
- 1 cup granulated sugar
- 2 tablespoons brown sugar
- 3 eggs room temperature
- 5.5 ounces pumpkin puree (⅔ cup)
- 1 teaspoon vanilla extract
- powdered sugar for rolling the cake
For the cream cheese filling
- 8 ounces cream cheese softened
- ½ cup unsalted butter softened
- 3 cups powdered sugar add additional to get desired consistency
- 1 teaspoon pumpkin pie spice
Instructions
To make the pattern batter
- Add your leaf pattern to parchment paper by tracing the leaves on the back of the paper. Grease the jelly roll pan and lay your parchment paper with tracings down. Set aside.
- Using a hand mixer or a stand mixer fitted with the paddle attachment, cream the butter and the sugar for 1-2 minutes.
- Add the egg, vanilla extract and milk. Beat for an additional 2 minutes.
- In a separate bowl, whisk together the dry ingredients (flour, salt, baking powder).
- Slowly add the dry ingredients to the wet ingredients. Mix until combined.
- Spoon the batter into 3-4 separate bowls and add food coloring to each to make the leaf colors (red, yellow, orange, brown, etc.).
- Spoon the colored batters into separate piping bags and cut very small tips on the end of each.
- Fill in the leaf patterns as desired, freezing for 15-20 minutes after each color addition to prevent the colors from bleeding (see above for more detail).
- Once finished, place the pan back in the freezer as you prepare your pumpkin cake batter.
To make the cream cheese filling
- Using a hand mixer or a stand mixer fitted with the paddle attachment, beat the cream cheese and butter until smooth.
- Add powdered sugar, one cup at a time, until you have reached your desired frosting consistency. (I usually use 3-4 total cups)
- Add the pumpkin pie spice, mix until combined. Set aside, but leave at room temperature so that the frosting will spread easily on to the cake roll.
To make the pumpkin cake
- Preheat the oven to 350 degrees.
- Using a hand mixer or a stand mixer fitted with the paddle attachment, beat sugar, brown sugar and eggs together for 2-3 minutes, or until the mixture is light and foamy.
- Add the pumpkin puree and vanilla extract. Mix until combined.
- Whisk together the dry ingredients (flour, pumpkin pie spice, baking powder, baking soda, salt).
- Add dry ingredients to wet ingredients. Mix on low speed until combined, then scrape down the bowl.
- Spread the pumpkin cake batter directly on top of the piped pattern. Smooth it until it is evenly spread over the entire jelly roll pan.
- Bake for 15-18 minutes, or until the cake begins to brown along the edges and it springs back to the touch.
- While the cake is baking, place a long piece of parchment paper on top of an upside down cookie sheet. You will be turning out your cake on to this, so make sure that the cookie sheet is large enough to fit the entire cake. Also make sure that you have a clean tea towel and powdered sugar at the ready.
- Once the cake is out of the oven, run a knife around the edges and immediately turn out on to your prepared parchment paper and cookie sheet.
- Peel off the parchment paper to reveal your leaf designs, then sprinkle a generous layer of powdered sugar on top of the cake.
- Next, place your tea towel over the sugared cake, followed by the jelly roll pan that you used to bake the cake. Flip the cake back over.
- Peel the parchment paper off of the cake and generously sprinkle powdered sugar over this side of the cake as well.
- Lastly, use the tea towel to roll the cake up (the towel will remain inside of the cake). Set it on a cooling rack and let it cool to room temperature.
To fill the cake roll
- Once the cake has cooled to room temperature, you can unroll it.
- Spread the cream cheese frosting evenly over the cake, leaving 1 inch empty on each side of the cake.
- Re-roll the cake, this time without the tea towel.
- Brush away any excess powdered sugar, then let the cake rest in the refrigerator overnight. Most of the powdered sugar will soak into the cake then, but any leftover sugar can be brushed away with some water so that you can make sure to showcase all of your leaf design!




It seems to difficult a video would be nice
that’s on my list! Stay tuned 🙂