
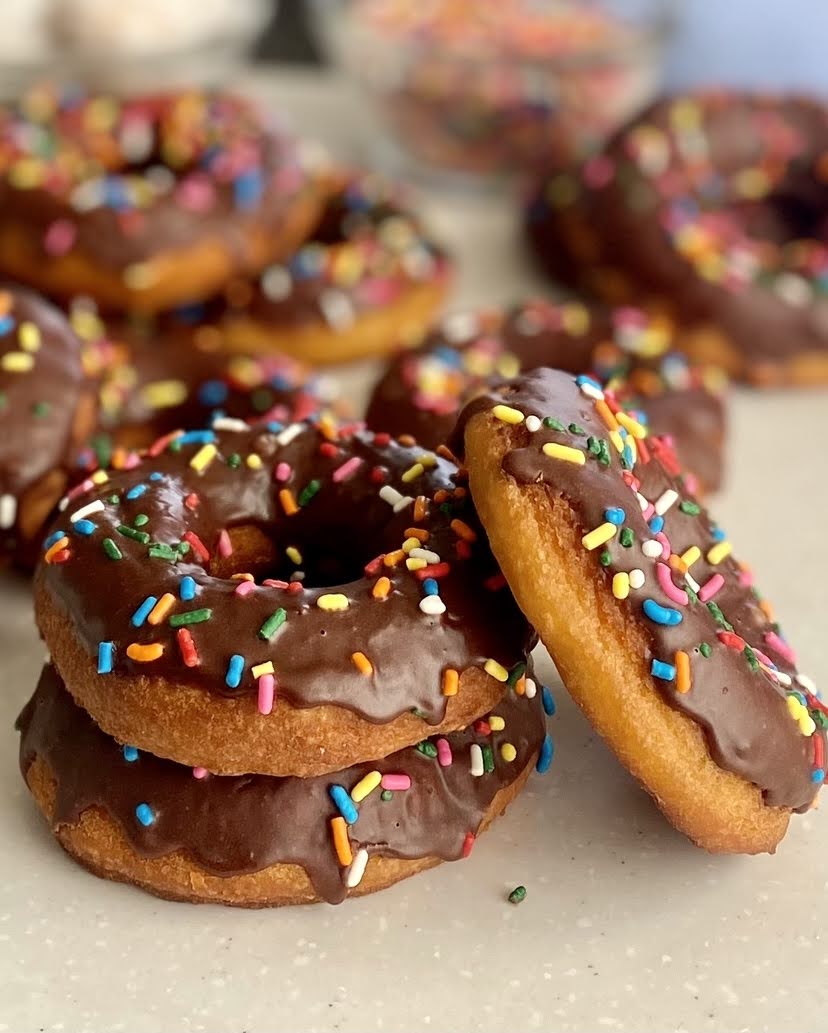
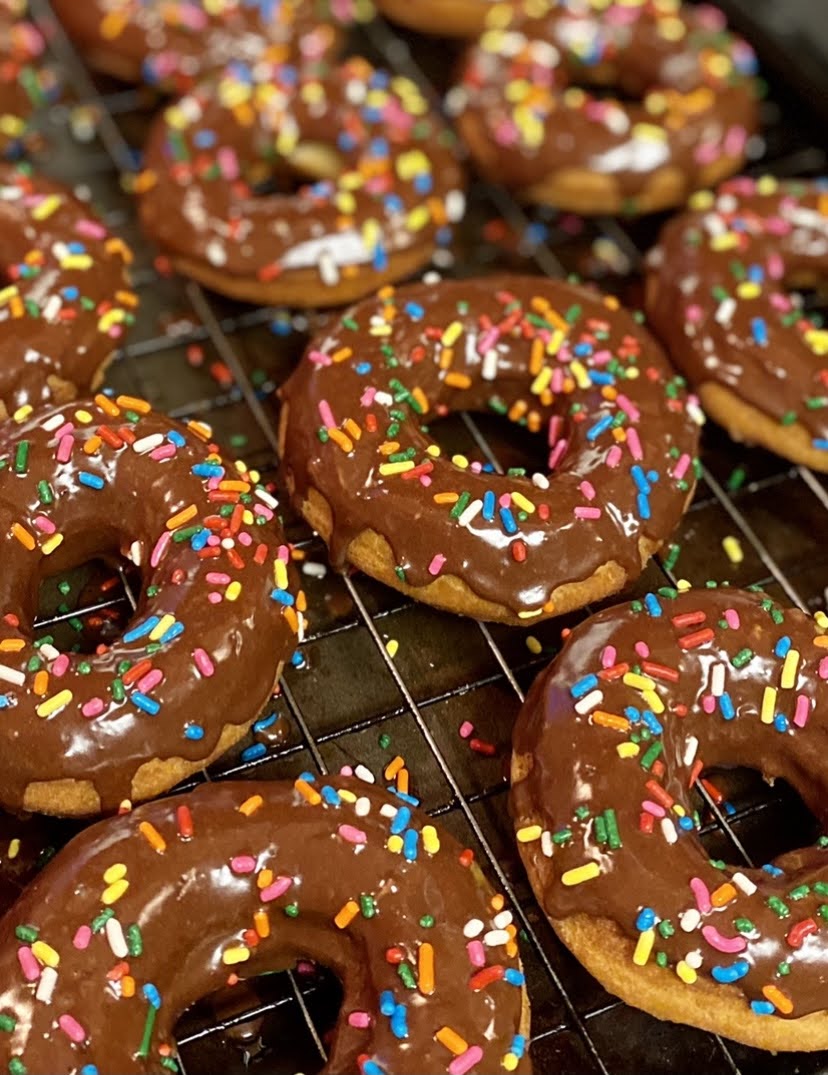
These fried cake donuts taste JUST like what you would purchase at a bakery! They are crispy and light, and topped with a chocolate glaze and sprinkles. You just can’t get this texture with a baked donut! So take the leap today and try making your own homemade fried donuts – I promise that they aren’t as difficult as they seem.
Hang tight, because I will walk you through every step to make the best homemade fried cake donuts – I promise it isn’t as daunting as it seems! Fried donuts give you that bakery-quality taste and texture that you just cannot get from baked donuts, so I highly recommend giving these a try! I have worked to come up with the most no-nonsense recipe that is still light and cake-y. The donut glaze also sets after the donut is dipped, so they are less messy but still so delicious!

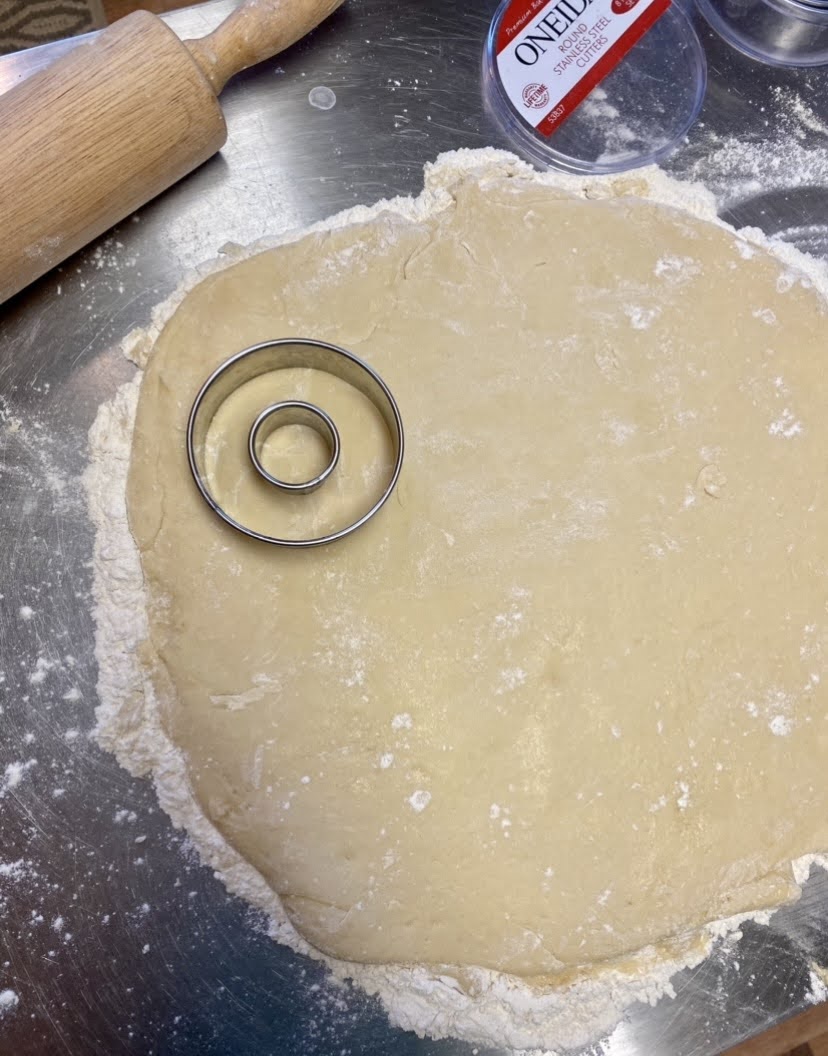
To make these donuts, I highly recommend using round cookie cutters (linked here) or a donut cutter (linked here), but a mason jar and cutting around a quarter can work in a pinch! To turn the donuts in the oil, I prefer to use a candy dipping scoop (linked here), but a fork or spoon will work as well. Follow the directions and photos below to guide you through your donut-making experience!

Tips for making this recipe:
- I highly recommend buying round cookie cutters or a donut cutter (linked above), but you can use a mason jar lid and cut around a quarter in a pinch
- Your oil (canola or vegetable oil) should be about an inch deep – the donut dough may be fully submerged when you drop it into the oil, but as it rises, half of it will be out of the oil.
- Make sure that your surface is well-floured before placing the dough on it to roll out. It will be very sticky at first, so continue adding flour as you work it with your hands. Then flour the rolling pin and roll out to 1/4-1/2 inch thick.

Happy baking!
Classic Fried Cake Donuts
Ingredients
For the donut batter
- 3½ cups all-purpose flour
- ¾ cup granulated sugar
- ¾ cup buttermilk *see notes for simple substitution
- 2 eggs
- ¼ cup vegetable or canola oil
- 1 teaspoon pure vanilla extract
- 1 teaspoon salt
- 2½ teaspoons baking powder
- 1-2 cups vegetable or canola oil for frying
For the chocolate glaze
- 1½ cups powdered sugar
- ¼ cup cocoa powder
- 1 tablespoon corn syrup
- 3-4 tablespoons water
- ½ cup sprinkles for topping optional
Instructions
To make the donuts
- If you are using the buttermilk substitution of 2 teaspoons vinegar plus remaining 3/4 cup milk, mix that together first and let sit while you prepare other ingredients.
- Using a hand mixer and a medium bowl or a stand mixer, combine sugar, oil and eggs. Mix until combined.
- Add buttermilk, vanilla extract, salt and baking powder. Mix until combined.
- Add flour, 1-1 1/2 cups at a time. Mixing after each addition.
- Turn out the batter on to a well-floured surface and thoroughly sprinkle the top of the dough with more flour. Use your hands to work the dough, adding more flour as needed, until smooth and not too sticky. Use a floured rolling pin to roll the dough until 1/4-1/2 inch thick. See photo above.
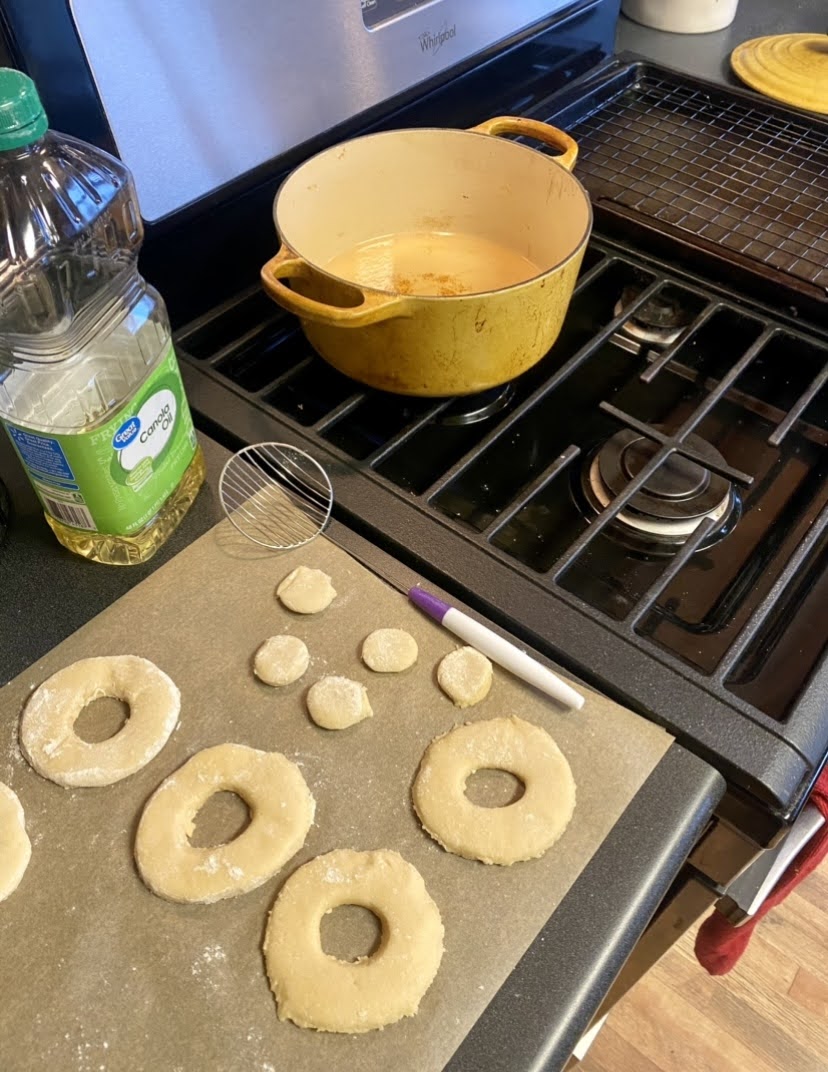
- Use a donut cutter, round cookie cutter, mason jar lid or empty can to cut out donut shapes. Save the centers to make as donut holes if desired. **see notes for ideas for household items to use as donut cutter. See photo above.
- Place the donuts on a piece of parchment paper next to the stove where you will be frying the donuts.
- Reroll the dough, adding additional flour as needed, to create more donuts.
- Fill a dutch oven or medium-sized pot with 1-1 1/2 inches of oil. Heat on medium heat for 2-3 minutes (or until the oil reaches 350-360 degrees, if you have a thermometer to check).
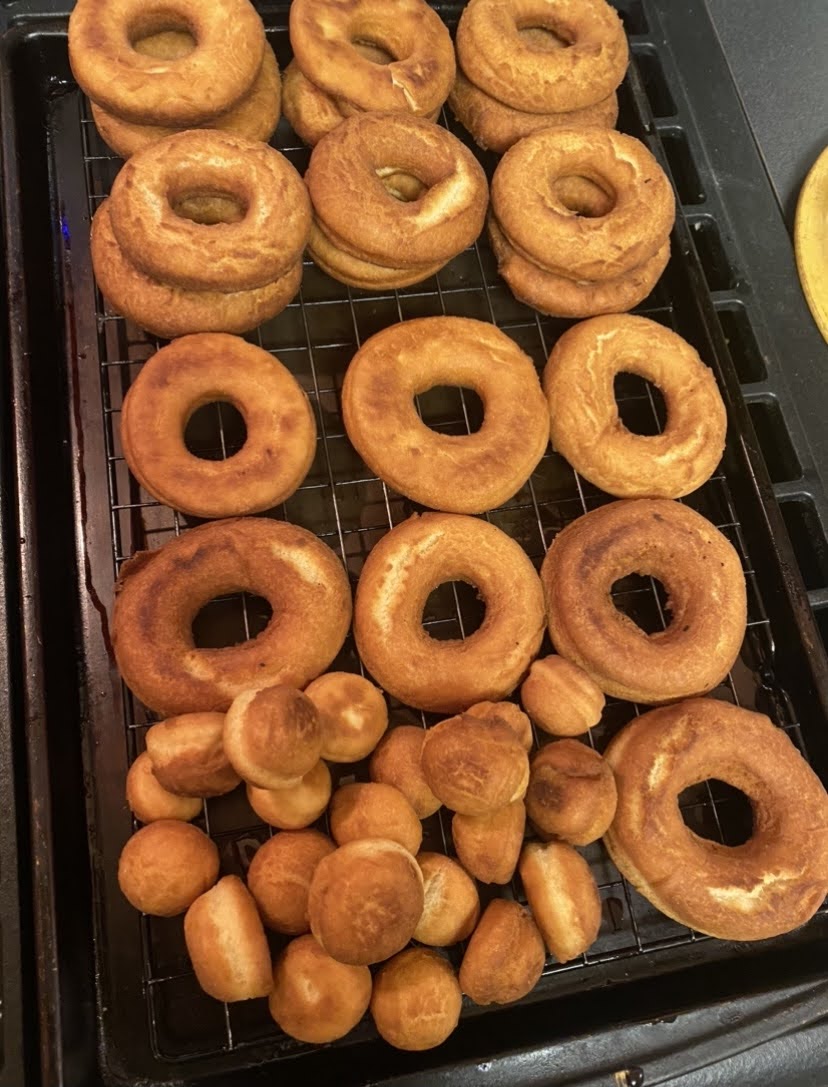
- Gently place one or two donuts into the oil and flip them with a candy dipper or fork after 1-2 minutes or when they are browned. Cook the other side for 1-2 minutes then remove them from the oil and place on a cookie sheet to cool (I prefer to prep a cookie sheet with a cooling rack (photo above) to dry/cool the donuts).
- Repeat until you have finished all of the donuts, then allow them to cool to room temperature before adding the chocolate glaze.
To make the chocolate glaze
- In a medium bowl, combine powdered sugar and cocoa powder with a fork or whisk.
- Add corn syrup and 3 tablespoons of water. Mix well. Add additional water if needed to reach desired texture (should be runny enough to dip the donuts).
- Gently dip the top half of the cooled donuts in the chocolate glaze and place back on drying rack. Add sprinkles, if desired, and allow them to set (glaze with harden and become less sticky).
- Store and enjoy at room temperature.


One Comment